
How to Install Wheel Spacers: Complete Guide for Safe Wheel Spacer Installation
Wheel spacers are one of the most impactful modifications you can make to your vehicle’s appearance and performance. Installing wheel spacers pushes your wheels outward, widening the vehicle’s track width and giving it a more aggressive stance. Beyond aesthetics, properly installed wheel spacers can improve handling stability and provide clearance for larger brake calipers. However, wheel spacers also introduce additional stress on wheel bearings and mounting components, making correct installation absolutely critical.
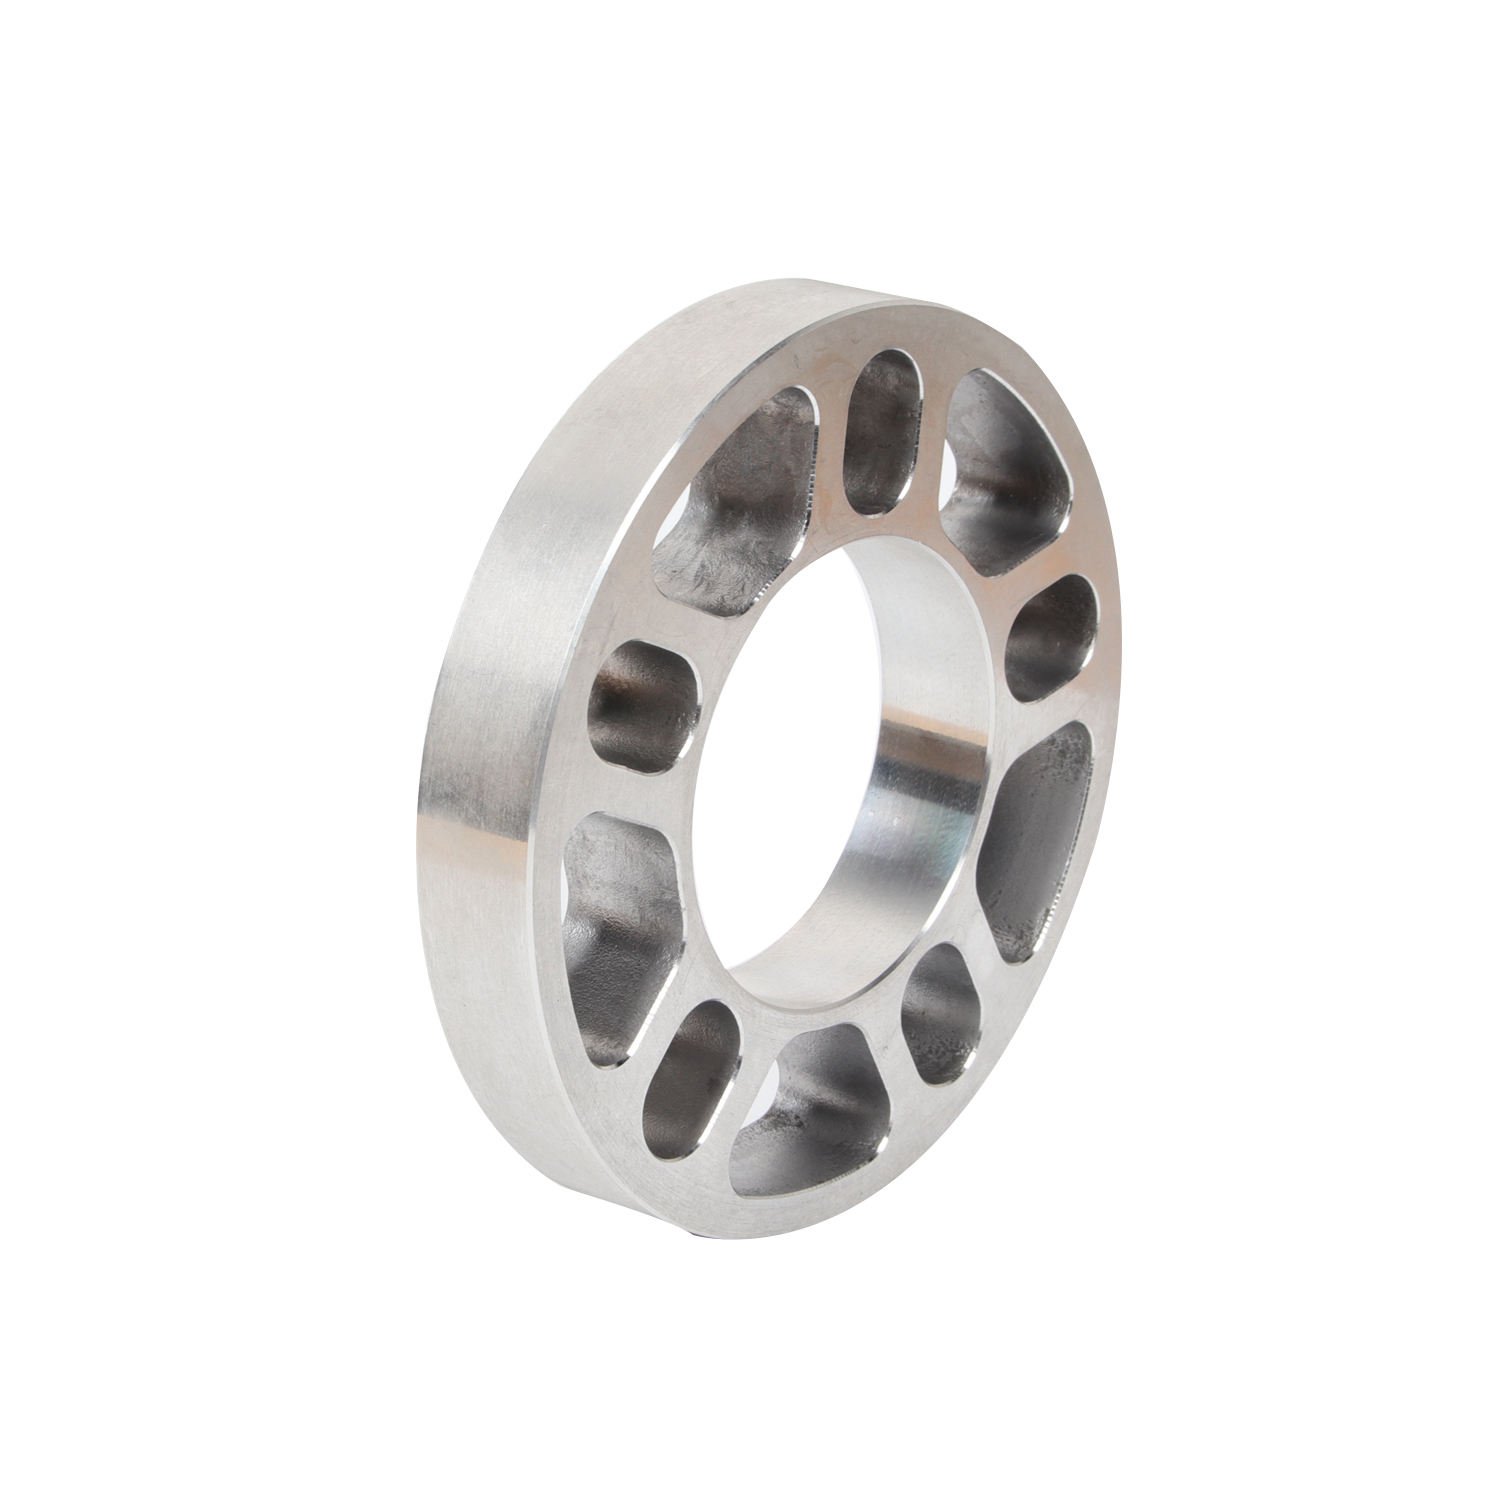
This guide walks you through everything you need to know about installing wheel spacers safely and correctly. Whether you’re installing hub-centric spacers for a daily driver or bolt-on racing spacers for the track, proper installation ensures your wheels stay secure and your vehicle remains safe to drive.
Understanding Wheel Spacers
Before purchasing and installing wheel spacers, understanding what they are and how they work helps you make informed decisions and install them correctly.
What Wheel Spacers Do
A wheel spacer is a machined disc that installs between your vehicle’s wheel hub (or brake rotor) and your wheel. It effectively moves the wheel outward from the hub by the spacer’s thickness, which typically ranges from 5mm to 3 inches or more depending on the application.
This outward movement accomplishes several things:
Wider Stance: The most obvious benefit is aesthetic. Wider track width gives vehicles a more aggressive, planted look that many enthusiasts prefer.
Improved Handling: A wider track width lowers the center of gravity relative to the wheel width, improving cornering stability and reducing body roll. For performance driving, this can be a meaningful advantage.
Brake Caliper Clearance: Many aftermarket brake upgrades require more wheel bore clearance than factory wheels provide. Wheel spacers push the wheel outward to create clearance for larger calipers.
Fixing Wheel Fitment Issues: If your aftermarket wheels don’t sit flush with the hub, spacers can correct the offset and bring wheels to the desired position.
Accommodating Deep Dish Wheels: Deep dish wheels often have offset that places them too far inward. Spacers bring them out to the correct position.
Types of Wheel Spacers
Different spacer designs offer different characteristics in terms of strength, installation complexity, and cost.
Hub-Centric Wheel Spacers: These spacers center on the wheel hub using a machined lip or step that matches the hub’s diameter. The wheel centers on the spacer rather than the lug nuts. Hub-centric spacers are generally safer because they prevent vibration and ensure the wheel seats properly against the spacer’s centering surface. Quality hub-centric spacers are essential for street-driven vehicles.
Lug-Centric Wheel Spacers: These spacers rely entirely on the lug nuts to center the wheel. They’re less expensive and can work for racing applications where wheels are frequently changed, but they can cause vibration if not perfectly matched. Avoid lug-centric spacers for street use—hub-centric is the safer choice.
Bolt-On Spacers (Race Spacers): These spacers bolt directly to the vehicle’s hub using longer studs, and then the wheels bolt to the spacer’s studs. They’re typically used for racing where quick wheel changes matter and the vehicle will be frequently serviced. Race spacers are very strong but require careful installation to ensure the mounting surfaces are clean and the spacers seat fully.
Slip-On Spacers: These thinner spacers (usually under 10mm) slide over the existing wheel studs and thread onto the hub. They increase track width slightly without requiring extended studs. They’re generally acceptable for minor adjustments but are limited in how thick they can be while remaining safe.
Forged vs. Cast vs. Billet Spacers: The manufacturing method affects strength. Forged spacers are strongest—they’re compressed under extreme pressure, aligning the metal’s grain structure for maximum strength. Billet spacers are machined from solid metal and are also strong. Cast spacers are poured into molds and are the weakest option, more prone to cracking under stress. Always choose forged or billet spacers from reputable manufacturers.
Choosing the Right Wheel Spacers
Selecting appropriate spacers for your vehicle and application is the first critical step toward a successful installation.
Matching Specifications
Bolt Pattern: Your vehicle’s wheel bolt pattern must match the spacers exactly. Common patterns include 5×114.3 (many Japanese and domestic vehicles), 5×100 (various imports), 5×4.5 (5×114.3 in SAE measurement), 5×120 (BMW, some GM vehicles), and many others. Using spacers with the wrong bolt pattern is dangerous—wheels simply won’t mount correctly.
Center Bore: The spacers’ center bore must match or exceed your hub’s center diameter. Quality spacers are hub-centric with a machined center bore that matches specific vehicles. Universal spacers with large center bores require hub-centric rings (plastic or aluminum) to center them properly.
Thickness: Choose the minimum thickness that achieves your goals. Thicker spacers introduce more stress on wheel bearings and suspension components. For street use, 15-25mm spacers are common. Racing applications may use much thicker spacers but typically accept the increased maintenance and component stress.
Thread Pitch: Extended wheel studs must match your vehicle’s thread pitch. Common pitches include 12×1.5 (most Japanese vehicles), 14×1.5, and 12×1.25. Mixing thread pitches means studs won’t seat properly.
Load Rating: Spacers must be rated for your vehicle’s weight and intended use. Check the manufacturer’s specifications and ensure they exceed your needs. Quality manufacturers provide load ratings with safety margins.
Quality Considerations
The spacer market includes significant quality variation. Choose spacers from reputable manufacturers that provide:
Material Certification: Quality spacers are made from tested materials—typically 6061-T6 or 7075-T6 aluminum. Cheap spacers may use inferior alloys prone to fatigue and failure.
Heat Treatment: Proper heat treatment (T6 temper) ensures the aluminum achieves its rated strength. Inferior heat treatment creates weak spots.
Machining Standards: Quality spacers have precisely machined surfaces with consistent dimensions. Inconsistent machining means wheels won’t seat properly.
Included Hardware: Quality spacer kits include hub-centric rings, lug nuts or studs of appropriate strength, and clear instructions.
Warranty and Support: Reputable manufacturers stand behind their products with warranties and technical support.
Avoid the cheapest spacers you find online. The potential consequences of spacer failure—wheel separation at speed—are catastrophic. A few dollars saved on cheap spacers isn’t worth the risk.
Tools and Materials Needed
Gather everything before you begin. Wheel spacer installation requires specific tools to ensure correct and safe installation.
Hand Tools
A reliable torque wrench is absolutely essential—you cannot install wheel spacers safely without one. You’ll need a torque wrench capable of the specifications required for your vehicle’s lug nuts (typically 75-120 ft-lbs depending on the vehicle). A clicker-type torque wrench is preferred for consistency.
A socket set in the sizes matching your lug nuts handles removal and installation. Most vehicles use 19mm, 21mm, or 17mm sockets. Have multiple sizes available since some aftermarket wheels use different lug sizes.
A breaker bar or impact wrench helps remove lug nuts, especially if they’ve been on for a while. An impact wrench makes the job faster but isn’t strictly necessary.
Torque extension bars or appropriate torque-limiting tools for lug nuts ensure proper seating of the spacer and wheel.
Lifting and Supporting Equipment
A hydraulic floor jack lifts the vehicle safely. You need enough capacity for your vehicle’s weight—most passenger vehicles need at least a 2-ton jack.
Jack stands support the vehicle while you work. Never work under a vehicle supported only by a jack. Minimum of two stands, preferably four for stability during extended work.
Wheel chocks prevent the vehicle from rolling while elevated.
Inspection and Measurement Tools
A dial indicator or caliper verifies spacer thickness and hub dimensions if needed. This isn’t always required but helps verify components are correct.
Thread pitch gauge ensures replacement studs match your vehicle’s specifications.
Spacer-Specific Components
Depending on your spacer type, you may need:
Extended Wheel Studs: If your spacers are thick enough to prevent your factory studs from engaging the wheel’s lug seats, you’ll need longer studs.
Hub-Centric Rings: For spacers with larger center bores than your hub, these plastic or aluminum rings center the spacer on the hub.
New Lug Nuts or Bolts: Extended studs typically require matching lug nuts. Some spacers include replacement hardware; others require you to source it separately.
Thread Locker: For extended studs, medium-strength thread locker on the nuts prevents loosening from vibration.
Step-by-Step Installation Process
With the right spacers selected and tools gathered, let’s walk through the installation process.
Step 1: Safety Preparation
Safety comes first. Park on a level, solid surface—concrete or asphalt is ideal. Apply the parking brake and block the opposite wheels to prevent any movement.
Loosen the lug nuts on the wheels you’ll be working on before lifting the vehicle. This is easier while the wheels are still on the ground. Break the lug nuts loose but don’t remove them yet.
Lift the vehicle at the manufacturer’s recommended lift points (check your owner’s manual). Once the wheel is off the ground, support it securely on jack stands. Never work under a vehicle supported only by a jack.
Remove the wheel completely and set it aside in a safe location.
Step 2: Inspect the Hub and Components
Before installing the spacers, inspect the mounting surfaces:
Clean the Hub: Remove any dirt, rust, or debris from the hub’s mounting surface. Use a wire brush or scraper if necessary. The hub surface must be completely clean for the spacer to seat properly.
Check for Damage: Inspect the hub for any cracks, excessive wear, or damage that might affect spacer installation. Minor surface corrosion is normal and can be cleaned; significant damage requires repair before proceeding.
Inspect Wheel Studs: Check that all wheel studs are present, undamaged, and not excessively corroded. Bent or damaged studs should be replaced before installing spacers.
Clean the Brake Rotor or Drum: If the spacers mount against the brake rotor (some designs), ensure the rotor surface is clean and free of debris that might prevent full seating.
Step 3: Install Hub-Centric Rings (If Required)
If your spacers have a center bore larger than your hub, you’ll need to install hub-centric rings to properly center the spacer:
Identify the Correct Ring: Hub-centric rings are sized to fit your specific hub diameter. Ensure you have the correct ring for your vehicle.
Clean the Ring Channel: Remove any debris from the ring groove in the spacer’s center bore.
Install the Ring: Press the hub-centric ring into the spacer’s center bore. The ring should fit snugly but not require excessive force. Some rings use clips; others rely on friction fit.
Verify Ring Security: Once installed, the ring should stay in place when you handle the spacer. If it falls out easily, it may be the wrong size or need adhesive.
Step 4: Install the Spacer on the Hub
With the hub clean and any necessary rings in place, install the spacer:
Position the Spacer: Place the spacer over the hub, aligning any mounting features (stud holes, bolt patterns). The spacer should seat flat against the hub surface with no gaps.
Check Center Bore Engagement: If using hub-centric rings, verify the ring fully engages the hub’s center step. The spacer should be centered on the hub, not resting on the lug nuts.
Install Mounting Bolts (Bolt-On Spacers): For bolt-on spacers that use their own mounting bolts, install these bolts now. Apply thread locker to the bolts and torque to the manufacturer’s specification, typically 70-90 ft-lbs depending on the application. Tighten in a star pattern to ensure even seating.
For Slip-On Spacers: The spacer slides over the existing studs. Ensure all studs pass through the spacer’s holes. The spacer should seat fully against the hub with no rocking or gaps.
Step 5: Install Extended Wheel Studs (If Required)
If your spacer thickness prevents your factory studs from adequately engaging the lug nuts, you’ll need to install extended wheel studs:
Select Correct Studs: Ensure the replacement studs match your vehicle’s thread pitch and length specifications.
Press or Thread the Studs: Installation methods vary by design. Some studs thread into the hub; others press in. Follow the manufacturer’s instructions for your specific studs.
Apply Thread Locker: Use medium-strength thread locker on the studs where they engage the hub to prevent loosening.
Verify Stud Projection: The studs must extend far enough past the spacer’s face to properly engage the wheel’s lug seats. Generally, studs should extend at least one full thread depth past the spacer’s thickness. If studs are too short, the lug nuts won’t have adequate thread engagement.
Step 6: Install the Wheel
With the spacers properly mounted, install your wheel:
Position the Wheel: Lift the wheel to the vehicle and align the lug holes with the studs or bolts. The wheel should seat fully against the spacer’s face.
Verify Seating: Before installing any lug nuts, check that the wheel is fully seated against the spacer. There should be no gap between the wheel and spacer. If there’s a gap, investigate the cause—usually debris or incorrect spacer selection.
Hand-Tighten Lug Nuts: Start all lug nuts by hand to avoid cross-threading. Ensure each nut threads freely before tightening.
Step 7: Torque Lug Nuts to Specification
This is the most critical step in the entire installation. Proper lug nut torque ensures the wheel, spacer, and hub are all secure.
Torque Sequence: Tighten lug nuts in a star pattern (alternating opposite nuts) to ensure even seating. This prevents the wheel from being pulled onto the studs unevenly.
Torque Specification: Consult your vehicle’s specifications for the correct lug nut torque, typically found in the owner’s manual or on a door jamb sticker. Common specifications include:
- 15mm studs: 70-80 ft-lbs
- 12mm studs: 80-100 ft-lbs
- 14mm studs: 90-120 ft-lbs
Use a Torque Wrench: Never use an impact wrench for final tightening—it can easily over-torque lug nuts, strip threads, or create uneven tightness.
Re-Torque After Driving: After the first 50-100 miles of driving, re-torque all lug nuts. The wheel and spacer seats can compress slightly, and the torque readings will change. Verify and correct as needed.
Step 8: Repeat for All Wheels
Install spacers on all wheels requiring them, following the same process for each position. If installing different thickness spacers front vs. rear, ensure you document which spacers go where to maintain consistency.
Step 9: Final Verification
Before driving, perform final checks:
Visual Inspection: Verify all wheels are seated flush against their spacers with no visible gaps. Check that no debris or foreign objects are trapped between mating surfaces.
Lug Nut Security: Confirm all lug nuts are torqued to specification. Use a second pass with the torque wrench to verify.
Wheel Rotation: With the vehicle still on jack stands, spin each wheel and verify it rotates freely without rubbing or interference.
Brake Function: Ensure the brakes operate normally with the new spacer configuration. Larger spacers may require brake caliper adjustments or different brake pads.
Safety Considerations and Warnings
Wheel spacer installation carries risks that demand respect. Follow these safety guidelines without exception.
Wheel Bearing Stress
Wheel spacers increase the lever arm that wheel bearings must support. The further the wheel sits from the bearing, the more stress the bearing experiences. This accelerates bearing wear and can cause premature failure.
Mitigation: Use the minimum spacer thickness that achieves your goals. Inspect wheel bearings more frequently with spacers installed. Choose hub-centric spacers that distribute loads properly. Some vehicles with weak stock bearings cannot safely accommodate spacers—know your vehicle’s limitations.
Stud and Nut Stress
Extended wheel studs experience greater stress with spacers. The longer lever arm increases bending loads during acceleration, braking, and cornering.
Mitigation: Use high-quality extended studs rated for spacer applications. Never reuse factory studs if they weren’t designed for spacer use. Inspect studs regularly for any signs of bending or fatigue.
Vibration and Loosening
Improperly installed spacers can vibrate, causing premature lug nut loosening and wheel separation risk.
Mitigation: Always use hub-centric spacers for street driving. Ensure spacers seat completely flat against the hub with no gaps. Torque lug nuts to specification using a torque wrench. Re-torque after the first drive.
Compatibility Issues
Spacers can cause interference with brake components, suspension parts, or bodywork that wasn’t designed for the increased track width.
Mitigation: Verify clearance before purchasing spacers. Check that wheels don’t rub the inside of the fender during suspension travel. Ensure brake calipers have adequate clearance. Test drive at low speeds first to identify any rubbing or interference.
Common Installation Mistakes to Avoid
These mistakes cause problems ranging from annoying vibrations to catastrophic wheel separation:
Skipping Hub-Centric Rings: If your spacers require hub-centric rings and you don’t install them, you’ll experience vibration at speed. The wheel won’t center properly on the hub.
Insufficient Thread Engagement: If your lug nuts don’t thread far enough onto the studs, they can loosen or fail. Ensure adequate engagement—typically the lug nut should be flush with or extend past the stud’s end.
Uneven Torquing: Tightening lug nuts in a random pattern rather than a star pattern creates uneven seating that can cause wheel runout and vibration.
Over-Torquing: Excessive torque strips threads, deforms components, and can cause breakage. Always use a calibrated torque wrench and follow specifications.
Reusing Factory Studs Incorrectly: Factory studs may not be long enough to engage properly when spacers are installed. Not addressing this leads to insufficient clamping force.
Not Re-Torquing After Driving: The wheel and spacer compress slightly during initial driving. Not re-torquing allows lug nuts to loosen progressively.
Ignoring Warning Signs: Vibration, unusual sounds, or lug nut loosening after installation indicates problems. Don’t ignore these signs—they’re warnings before failure.
Maintenance and Inspection Schedule
Wheel spacers require ongoing attention to ensure continued safe operation.
Regular Inspection Intervals
Every Oil Change: Check lug nut torque with a torque wrench. Inspect spacers for any cracks, deformation, or movement. Verify no corrosion is building up between mating surfaces.
Every 6 Months or 10,000 Miles: Deep inspection of spacer condition, hub-centric ring condition, extended stud condition (if applicable), and wheel bearing function. Any concerning findings should be addressed immediately.
Annually: Consider removal and reinstallation of spacers to clean mating surfaces, inspect components thoroughly, and apply anti-seize compound to prevent galvanic corrosion between aluminum spacers and steel hubs.
Signs of Problems
Watch for these warning signs that something needs attention:
- Vibration at certain speeds, especially during acceleration or braking
- Unexplained lug nut loosening
- Visible movement or gap between the spacer and hub or wheel
- Noise from the wheel area (clicking, clunking, grinding)
- Uneven tire wear suggesting alignment or bearing issues
Any of these signs warrant immediate inspection and likely removal of the spacers to diagnose the problem.
When Professional Installation Is Recommended
While wheel spacer installation is within capable DIY mechanics’ abilities, some situations warrant professional help:
If You’re Unsure About Any Step: Professional installation ensures correct work. It’s better to pay for installation than risk improper mounting.
For Vehicles with Complex Suspension: Some performance vehicles have suspension geometries that interact with spacers in complex ways. Professional installers understand these interactions.
For Racing Applications: Race vehicles experience extreme loads. Professional installation and regular maintenance by experienced technicians ensures reliability.
If You Notice Problems: If something seems wrong during installation or after driving, have a professional inspect the work. Don’t take chances with wheel safety.
Summary: Key Points to Remember
- Choose quality hub-centric spacers from reputable manufacturers—the cheapest option isn’t worth the safety risk
- Match specifications exactly—bolt pattern, center bore, thread pitch, and thickness must all be correct
- Never skip the torque wrench—proper lug nut torque is non-negotiable for safety
- Re-torque after first drive—the wheel and spacer seating changes slightly
- Inspect regularly—lug nut torque and spacer condition should be checked frequently
- Watch for warning signs—vibration, noises, or loosening indicate problems
- Use the minimum thickness needed—thicker spacers increase bearing stress
Wheel spacers can transform your vehicle’s appearance and, when properly installed, can be a safe modification that enhances your driving experience. Take the installation seriously, follow these guidelines carefully, and maintain the components properly. Your safety—and the safety of everyone around you—depends on wheels being secure.