
How to Use a Drop Spindle: Complete Installation
Drop spindles represent a sophisticated suspension modification that lowers vehicle ride height by repositioning the wheel mounting surface relative to the upper control arm attachment point. Unlike lowering springs that compress the suspension and reduce travel, drop spindles achieve the desired stance while maintaining full suspension articulation and factory-calibrated geometry.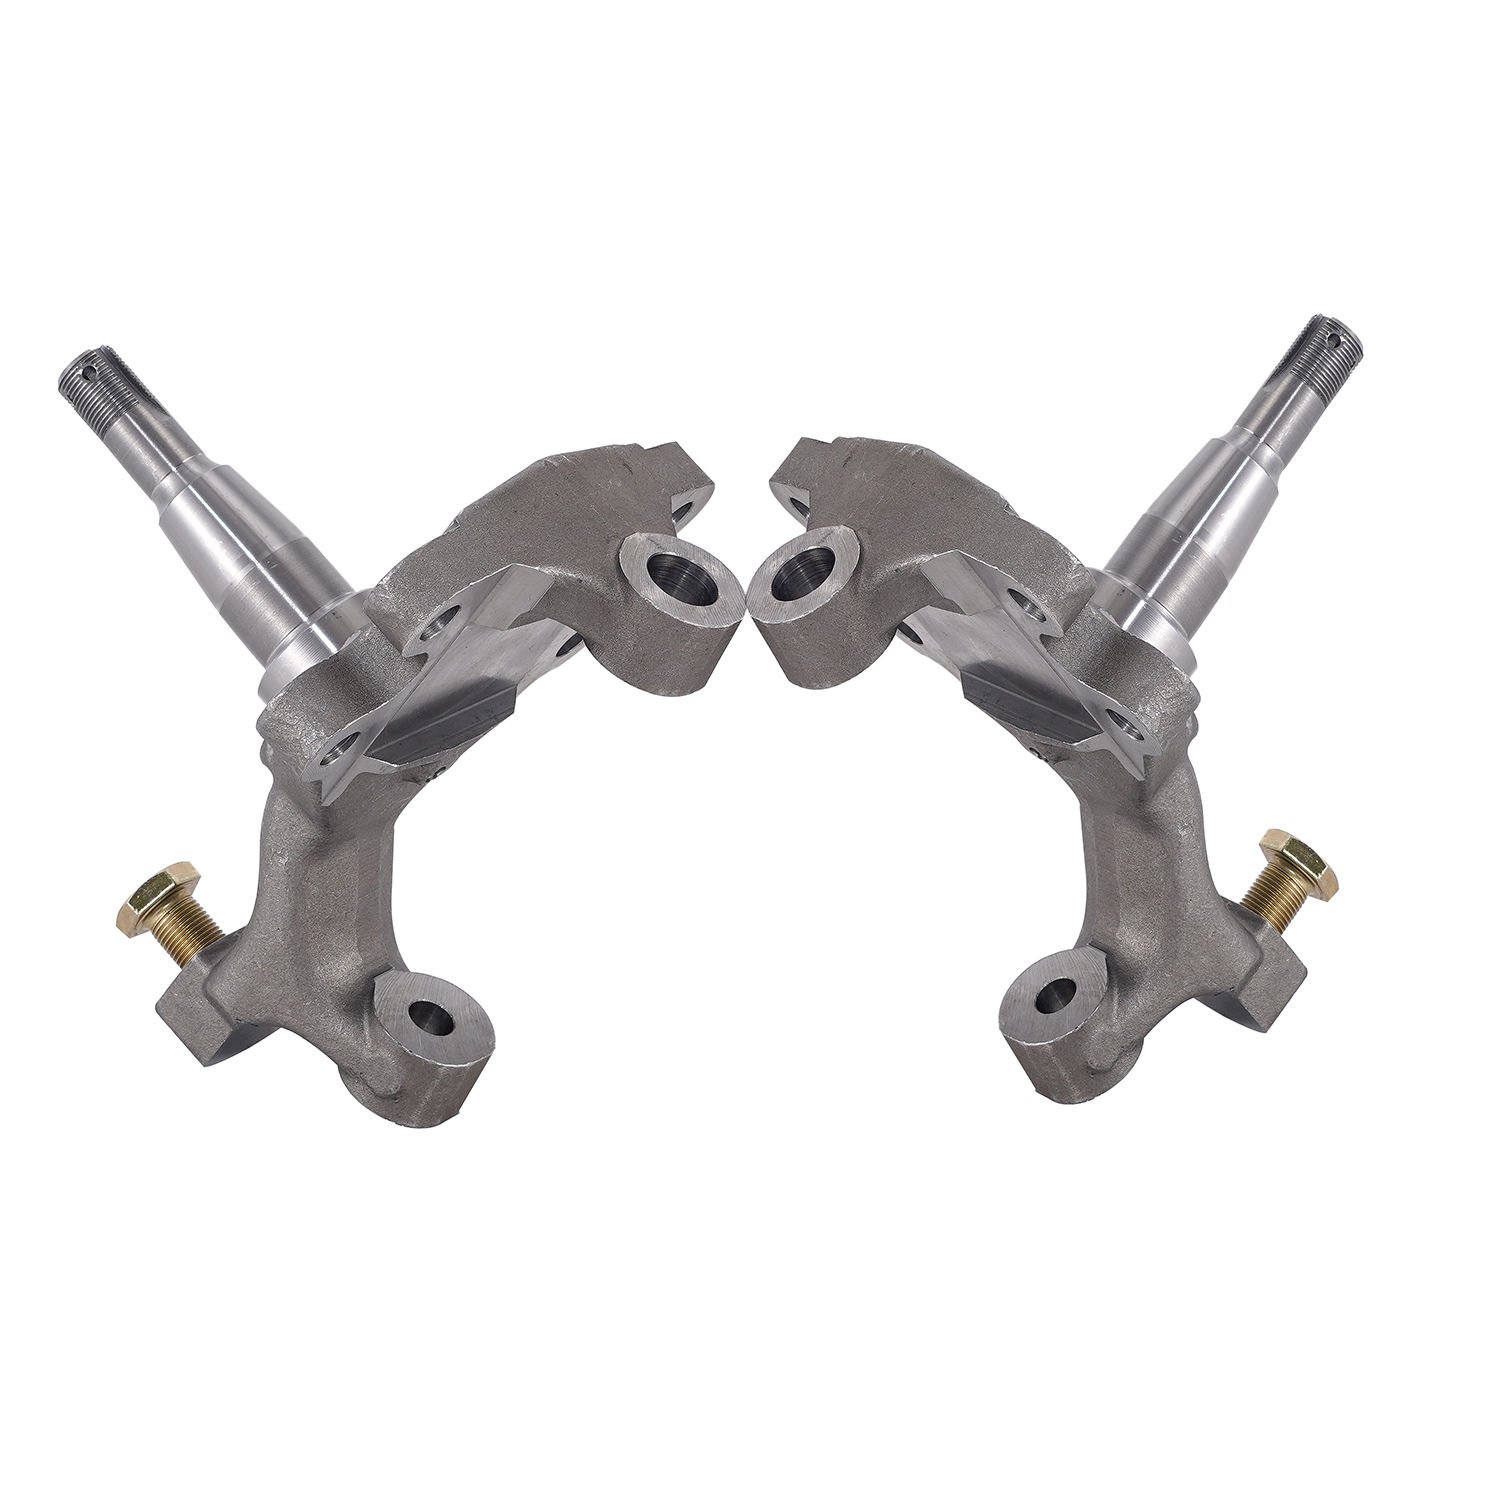
This technical guide provides comprehensive methodology for proper drop spindle application, covering selection criteria, installation procedures, and verification protocols that ensure safe, effective suspension modification for your vehicle.
Drop Spindle Fundamentals
Design Purpose and Function
The drop spindle modifies the relationship between wheel center and upper suspension components. By repositioning the steering spindle or wheel mounting surface higher on the spindle body, the modification effectively lowers the vehicle without compromising suspension travel or altering steering geometry beyond acceptable parameters.
| Function | Description | Performance Impact |
|---|---|---|
| Ride height reduction | Lowers vehicle 2-4 inches typically | Improved visual stance |
| Travel maintenance | Preserves full suspension articulation | Maintains handling capability |
| Geometry preservation | Keeps control arm angles unchanged | Predictable handling response |
| Component compatibility | Works with stock springs | Maintains factory ride quality |
Application Scope
Drop spindles are available for numerous vehicle applications, primarily focusing on classic American platforms where suspension modification remains popular. Common applications include Chevrolet/GMC trucks from various decades, GM A-body vehicles like Nova, Chevelle, and Camaro, and Ford platform vehicles with appropriate manufacturing support.
Not all vehicles have drop spindle options available. Application-specific manufacturing limits availability, and vehicle-specific fitment verification becomes essential before purchase or installation commitment.
Pre-Installation Preparation
Component Verification
Before beginning installation, verify all components and tools are present and appropriate for your application:
| Component | Verification Check | Purpose |
|---|---|---|
| Drop spindles (pair) | Match vehicle year/make/model | Correct fitment |
| Brake caliper brackets | Included or compatible | Brake system interface |
| Wheel bearings | Correct specifications | Hub interface |
| Ball joint hardware | New cotter pins, nuts | Secure attachment |
| Brake lines | Sufficient length/routing | System integrity |
Required Tools and Equipment
| Tool | Application | Specification Note |
|---|---|---|
| Floor jack | Vehicle lifting | Adequate capacity |
| Jack stands | Vehicle support | Minimum 4 stands |
| Ball joint separator | Ball joint removal | Pickle fork or screw type |
| Torque wrench | Fastener tightening | Calibrated, proper range |
| Socket set | Hardware removal/installation | Metric or SAE as applicable |
| Pry bar | Component separation | Appropriate size |
| Brake bleeder kit | Brake system service | If brake work required |
Vehicle Preparation
- Secure vehicle position: Park on level, solid surface with parking brake applied.
- Remove front wheels: Loosen lug nuts while vehicle is on ground, then raise and support vehicle securely on jack stands positioned at frame rails or manufacturer-specified support points.
- Verify vehicle stability: Attempt to move vehicle—it should remain completely stable on supports. Never work under vehicle supported only by jack.
Stock Spindle Removal Procedure
Brake Component Disassembly
- Remove brake caliper: Remove caliper mounting bolts and hang caliper from wire or coat hanger to prevent strain on brake line. Do not allow caliper to hang from brake line.
- Remove brake rotor: Extract rotor from hub assembly. Some rotors may require backing plate removal first or may have retaining screws requiring removal.
- Disconnect brake line: Remove brake line from mounting clip or bracket. Cap line to prevent contamination during spindle removal
- Remove dust shield: Extract mounting screws or clips and remove dust shield from spindle.
Steering and Suspension Disconnection
- Mark tie rod position: Before disconnecting, mark tie rod relationship to spindle for reference during reassembly.
- Disconnect tie rod end: Using ball joint separator, disconnect tie rod from steering arm. Support tie rod to prevent stretching.
- Remove sway bar end link: Disconnect end link from spindle if equipped.
- Support lower control arm: Position jack stand or floor jack under lower control arm to support suspension during spindle removal.
- Disengage upper ball joint: Remove cotter pin and ball joint nut. Use ball joint separator to disengage spindle from upper control arm.
- Disengage lower ball joint: Remove cotter pin and ball joint nut. Disconnect spindle from lower control arm using appropriate separator tool.
- Extract stock spindle: With all connections disengaged, remove stock spindle from vehicle. Inspect for wear, damage, or conditions that may have prompted replacement.
Drop Spindle Installation Procedure
Preparation Phase
- Clean mounting surfaces: Remove debris, rust, or corrosion from ball joint stud areas. Ensure clean metal-to-metal contact for proper torque application.
- Inspect replacement spindle: Verify drop spindle matches removed component in mounting provisions, brake component interface, and overall fitment. Compare dimensions if any doubt exists.
- Prepare new hardware: Install new cotter pins in packet, verify ball joint nuts are present, and prepare any included brake brackets or components.
Installation Sequence
Step 1: Initial spindle positioning
Align drop spindle with ball joint studs on both upper and lower mounting points. The spindle orientation must match the removed stock component, with steering arm positioned correctly for tie rod connection.
Step 2: Ball joint engagement
- Apply lubricant to ball joint studs for installation ease
- Position spindle against lower ball joint first
- Thread ball joint nut hand-tight to hold alignment
- Raise spindle to engage upper ball joint
- Thread upper ball joint nut hand-tight
Step 3: Torque specification application
| Fastener | Torque Specification | Note |
|---|---|---|
| Lower ball joint nut | 65-75 ft-lb (GM applications) | Verify application spec |
| Upper ball joint nut | 65-75 ft-lb (GM applications) | Verify application spec |
| Cotter pin installation | Insert through nut and stud | Never reduce torque for pin alignment |
Step 4: Steering linkage connection
- Connect tie rod end to steering arm on drop spindle
- Thread nut hand-tight
- Torque to specification (typically 35-50 ft-lb)
- Install new cotter pin—never loosen nut to align pin holes
Step 5: Brake component installation
- Install brake dust shield if removed
- Mount brake caliper bracket if separate from spindle
- Install rotor onto hub
- Mount brake caliper with specified fasteners
- Route and connect brake lines properly
Critical Verification Points
| Check | Method | Acceptance Criteria |
|---|---|---|
| Ball joint engagement | Visual and physical inspection | Full engagement, no movement |
| Brake line clearance | Cycle suspension through full travel | No contact, adequate clearance |
| Wheel bearing preload | Rotate wheel with engaged nut | Smooth rotation, no binding |
| Tie rod connection | Visual inspection | Proper seating, secure hardware |
| Lug nut seating | Verify hub surface clean | Full contact, even seating |
Suspension Travel Verification
Full Extension Check
With vehicle supported and wheels removed, cycle suspension through complete travel range:
- Full compression: Manually push spindle upward simulating suspension compression. Verify no binding, contact, or interference throughout range.
- Full extension: Pull spindle downward simulating suspension extension. Verify adequate clearance and no binding.
- Lateral movement: Check for abnormal lateral play indicating ball joint or bearing issue requiring correction.
Installation Quality Verification
| Test | Expected Result | Failure Indicator |
|---|---|---|
| Ball joint movement | No play or movement | Loose connection requiring correction |
| Bearing rotation | Smooth rotation without roughness | Indicates incorrect installation |
| Brake component clearance | No contact during travel | Requires adjustment or repositioning |
| Steering arm positioning | Matches original orientation | May indicate incorrect spindle |
Post-Installation Procedures
Wheel Installation
- Clean hub surface: Remove any debris, grease, or contamination from hub mating surface.
- Verify rotor seating: Ensure rotor seats fully against hub flange without interference.
- Install wheel: Hand-thread lug nuts to prevent cross-threading, then torque in alternating pattern to specification (typically 75-100 ft-lb for lug nuts).
Brake System Verification
- Bleed brake system: If brake lines were disconnected or system disturbed, perform complete brake bleeding at all wheel cylinders.
- Pedal feel verification: With engine off, pump brake pedal multiple times. Pedal should feel firm within 2-3 pumps. Spongy pedal indicates air in system requiring additional bleeding.
- Pressure hold test: Depress pedal and hold—pressure should remain constant without fade for 30 seconds.
Initial Alignment Check
Before operating vehicle:
- Verify wheel positioning appears correct (centered in wheel opening)
- Check that wheels are perpendicular to ground (visual assessment)
- Note any obvious alignment concerns requiring professional correction
Professional Alignment Requirement
Why Professional Alignment is Essential
Drop spindle installation significantly alters wheel positioning from factory specifications. Even though the modification maintains geometry parameters, the wheel position change requires new alignment targets specific to the drop spindle application.
| Alignment Parameter | Stock Specification | Drop Spindle Target | Difference |
|---|---|---|---|
| Camber | Factory range | Modified target | Application specific |
| Caster | Factory range | Modified target | Maintained |
| Toe | Factory target | Reestablished | Per manufacturer spec |
Professional alignment technicians understand application-specific targets and can establish proper alignment using specifications provided by drop spindle manufacturers. Never assume stock alignment specifications apply after drop spindle installation.
Pre-Alignment Vehicle Preparation
- Load vehicle normally: Alignment should be performed with vehicle at operating weight, including fuel and typical cargo.
- Warm tires: Drive vehicle briefly to bring tires to operating temperature for more accurate measurement.
- Specify modification: Inform alignment technician of drop spindle installation to ensure proper specification reference.
Common Installation Issues and Solutions
Ball Joint Engagement Problems
| Issue | Cause | Solution |
|---|---|---|
| Cannot seat spindle on ball joint | Corrosion or debris on studs | Clean stud surfaces thoroughly |
| Excessive play after torquing | Worn ball joint or incorrect nut | Inspect components, replace if worn |
| Stud damage during installation | Excessive force or improper tool | Replace damaged stud/housing |
Brake System Concerns
| Issue | Cause | Solution |
|---|---|---|
| Caliper does not fit | Wrong bracket or spindle | Verify application compatibility |
| Line contact at full travel | Improper routing | Reroute lines with additional clearance |
| Brake pedal soft after install | Air in system | Complete brake bleeding procedure |
Steering System Issues
| Issue | Cause | Solution |
|---|---|---|
| Tie rod does not reach | Incorrect spindle or orientation | Verify spindle orientation matches removed unit |
| Uneven steering effort | Alignment not performed | Schedule professional alignment |
| Binding during full travel | Interference with other components | Inspect and correct routing |
Maintenance and Inspection Protocol
Regular Inspection Schedule
| Interval | Inspection Items | Action If Finding |
|---|---|---|
| First 100 miles | Torque verification, alignment check | Re-torque if loosened |
| Every 5,000 miles | Ball joint condition, brake clearance | Professional inspection |
| Annual | Complete alignment verification | Adjustment as needed |
| Every 30,000 miles | Ball joint replacement consideration | Evaluate wear |
Wear Indicator Recognition
Watch for symptoms indicating maintenance needs:
- Uneven tire wear patterns suggesting alignment deviation
- Steering response changes or increased effort
- Suspension noise during articulation
- Visible movement at ball joint connections
- Brake-related symptoms (pull, fade, soft pedal)
FAQ: Technical Clarifications
Q: How do you install drop spindles on a vehicle?
A: Installation begins with vehicle support on jack stands, removal of wheels and brake components, disconnection of steering linkage and suspension connections from stock spindle. The drop spindle replaces the stock unit by engaging upper and lower ball joints, connecting tie rod end, and installing brake components. Torque all fasteners to specification, verify clearance through full suspension travel, and perform professional wheel alignment using application-specific targets.
Q: Can you use drop spindles with stock springs?
A: Yes, drop spindles are designed to work with factory or mildly lowered springs. Unlike lowering springs that require complementary shock upgrades to prevent harshness, drop spindles maintain the suspension’s designed operating range, allowing stock spring rates to function correctly. This compatibility represents one of the primary advantages of drop spindle modification over spring-based lowering methods.
Q: Do drop spindles require professional installation?
A: While mechanically competent DIY installers can perform drop spindle installation, professional installation ensures proper torque application, brake system verification, and alignment establishment. Given the safety-critical nature of suspension and steering components, professional installation provides confidence in proper procedure execution and results verification.
Q: What happens if drop spindles are installed incorrectly?
A: Improper installation creates dangerous driving conditions including steering failure, suspension collapse, or brake system compromise. Symptoms of improper installation include abnormal play in steering or suspension, uneven tire wear, binding during suspension travel, or brake system malfunctions. Any suspicion of improper installation requires immediate professional inspection before vehicle operation.
Q: How much lowering do drop spindles provide?
A: Drop spindles typically provide 2-4 inches of ride height reduction depending on application. The specific amount depends on spindle design, vehicle application, and combination with other modification methods. Some applications offer multiple drop amounts through different spindle options, allowing customization of final stance.
Q: Are drop spindles reversible modifications?
A: Yes, drop spindles represent a reversible modification. Stock spindles can be reinstalled to return vehicle to factory ride height and geometry. This reversibility makes drop spindles an attractive modification for vehicles that may need to return to stock configuration for various reasons, including resale, show competition, or restoration requirements..
Where to Buy a 2 inch drop spindles?
If you’re looking for a reliable supplier, it’s important to choose a manufacturer that offers:
- Stable product quality
- Consistent supply
- Wholesale support
- OEM branding options
For bulk orders or reseller inquiries, you can check this product page:
If you’re looking for a reliable supplier, it’s important to choose a manufacturer that offers:
- Stable product quality
- Consistent supply
- Wholesale support
- OEM branding options
For bulk orders or reseller inquiries, you can check this product page: