
How to Install Hood Pin Kit: Complete Guide for Quick-Release Hood Latches
Hood pins serve a specific purpose in automotive applications. Whether you’re building a race car that needs rapid access, installing a secondary latch for a street rod, equipping an off-road rig that demands reliable hood security, or simply adding a performance aesthetic to your daily driver, hood pins offer a straightforward mechanical solution that works reliably under demanding conditions.
Unlike factory hood latches that rely on multiple linkage components and potentially failure-prone mechanisms, a hood pin kit provides direct, positive engagement. When the pin seats, you know it’s secure. This guide walks you through everything from selecting the right hood pin kit for your application to the complete installation process.
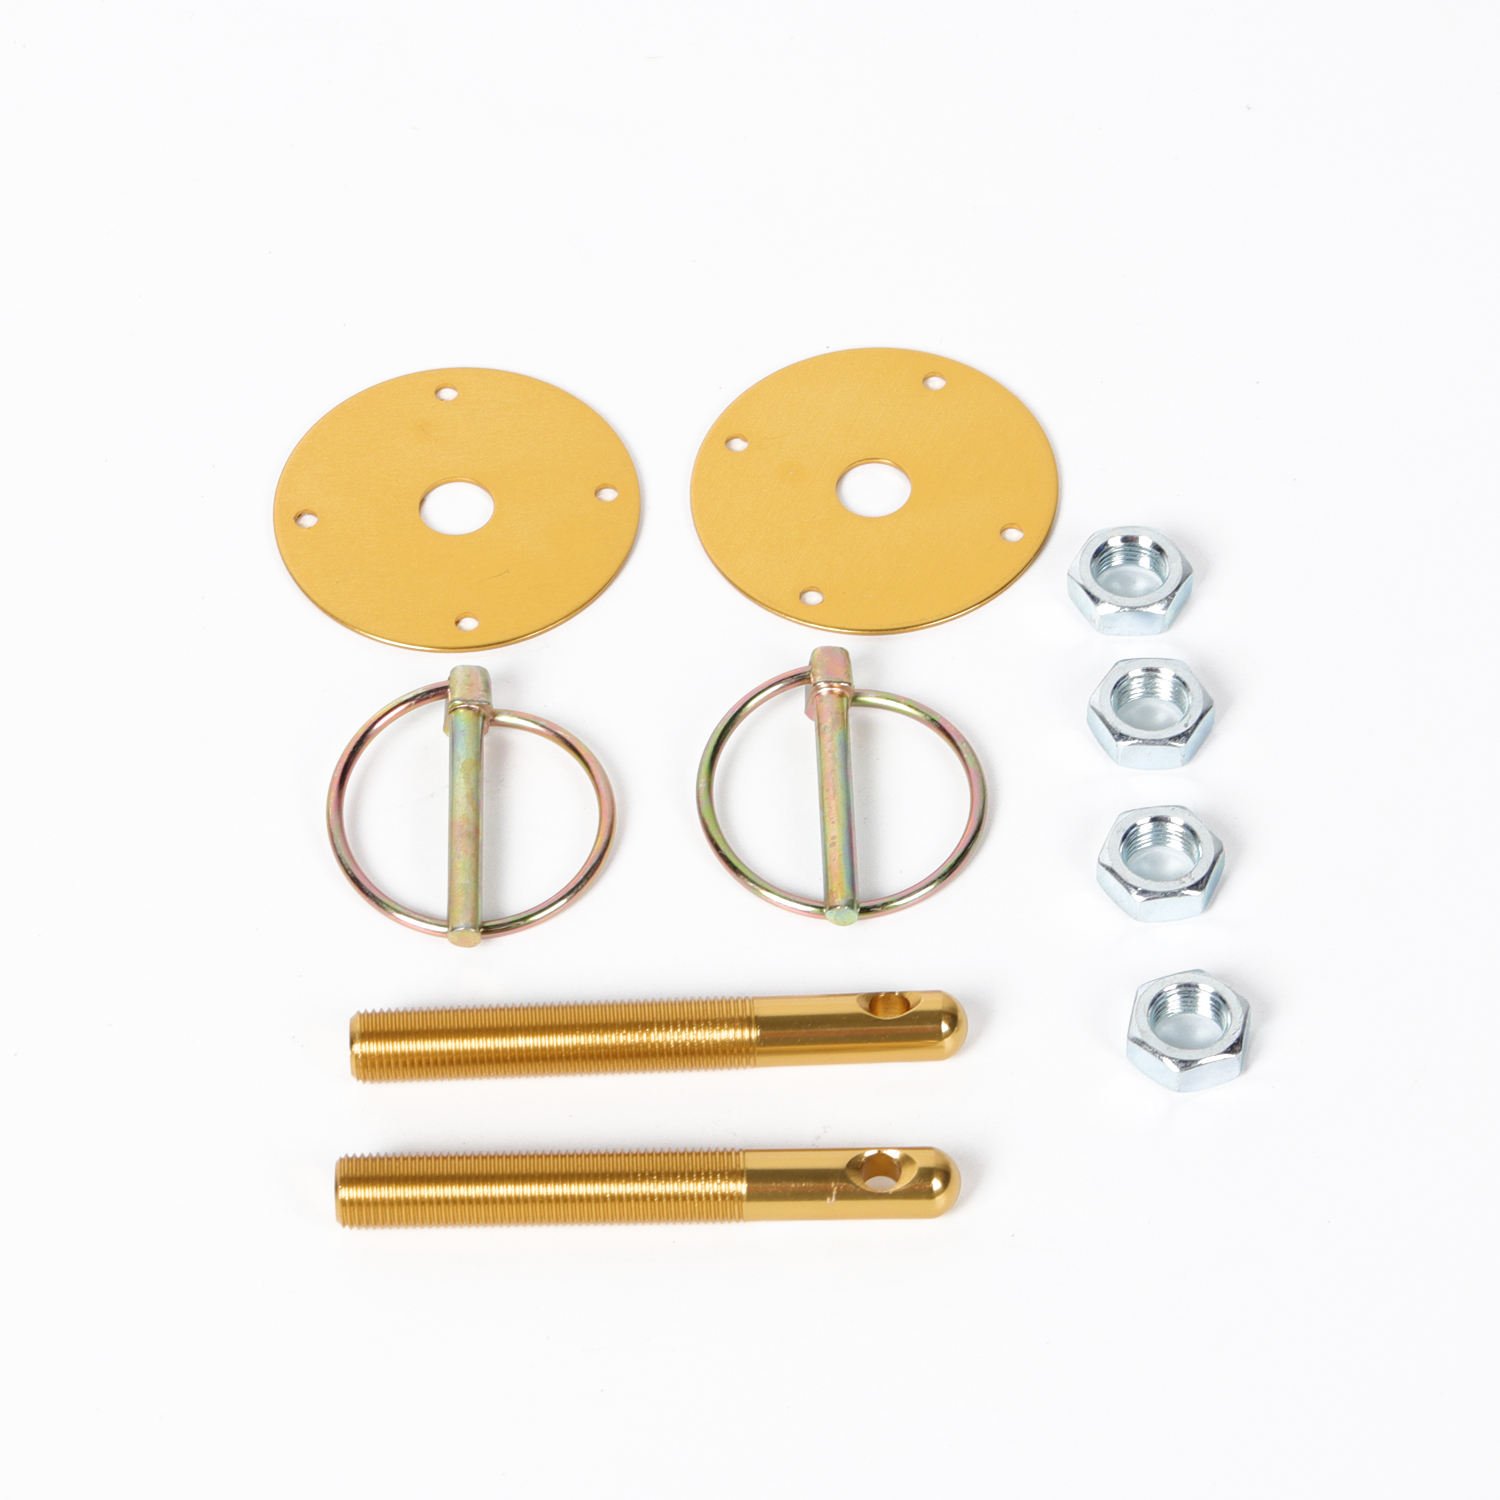
Understanding Hood Pin Kits
Before purchasing and installing a hood pin kit, understanding what you’re working with helps you make better decisions and avoid common mistakes.
What Hood Pins Do
Hood pins serve as mechanical fasteners that secure your hood in the closed position. A typical hood pin consists of a female receiver (often called the grommet or socket) mounted to the hood, and a male pin that passes through the receiver and locks the hood in place. Some kits use a single pin with a quick-release clip; others use double-pin systems with a tethered arrangement.
The primary advantages of hood pins over factory latches are simplicity, reliability, and speed. There’s no cable to stretch, no latch mechanism to jam, and no dependency on multiple pivot points. The hood either is or isn’t secured by the pin—there’s no ambiguity.
Types of Hood Pin Kits
Different applications call for different hood pin designs:
Fixed Hood Pins use a permanently installed pin that you thread through the receiver. These provide maximum security and are common on race cars and off-road vehicles where hood security is critical.
Quick-Release Hood Pins feature a spring-loaded mechanism that allows one-handed operation. Push to release, and the pin pops out. These are popular for street-driven vehicles where you need rapid hood access but want the hood pin aesthetic.
Stud-Style Hood Pins have a male stud protruding from the hood that inserts into a receiver on the body. The stud stays with the hood, and you engage it into the fixed receiver. These are common on classic muscle cars.
Magnetic Hood Pins combine the hood pin aesthetic with magnetic-assisted engagement. Less common but available for specific applications.
LED Hood Pins include built-in indicator lights that illuminate when the hood is properly secured. Popular for show cars and street rods where the illuminated pin adds visual appeal.
For most street applications, a quick-release hood pin kit offers the best balance of convenience and functionality. Race applications typically favor fixed pins for maximum security, while classic car restorations often use stud-style pins that match the original equipment.
Why Install Hood Pins
You might be installing hood pins for several reasons:
Racing Applications: NHRA and other racing organizations require hood pins for vehicles exceeding certain performance thresholds. Even if not mandated, many racers install them as a secondary safety latch in addition to the factory latch.
Off-Road Vehicles: Dust, mud, and water can compromise factory hood latches. Hood pins provide reliable engagement that won’t jam when you’re trail riding.
Street Rods and Custom Builds: Hood pins have a distinctive performance aesthetic that many enthusiasts appreciate. They also serve as functional accessories on heavily modified vehicles.
Secondary Safety Latch: Some installers add hood pins as a backup to the factory latch—two systems are better than one for critical safety connections.
Quick Access: If you frequently need to access your engine bay (track days, shows, maintenance), quick-release hood pins let you open the hood faster than fumbling with the factory release.
Choosing the Right Hood Pin Kit
Selecting the appropriate hood pin kit for your vehicle and application affects both installation difficulty and long-term satisfaction.
Compatibility Considerations
Material: Hood pins are typically aluminum or stainless steel. Aluminum is lighter and resists corrosion, but stainless offers maximum durability. For street-driven vehicles in corrosive environments (coastal areas, winter road salt), stainless steel is worth the additional cost.
Pin Diameter: Standard hood pins use 3/8″ to 1/2″ diameter pins. Larger diameter pins provide more shear strength but require larger mounting holes and receivers. Match the kit to your vehicle’s mounting locations and structural requirements.
Length and Reach: Measure the gap between your hood and body when closed. The pin must be long enough to pass through both mounting points with engagement to spare. Measure at the specific location where you’ll mount the pin—gaps vary across the hood surface.
Thread Pitch: If the kit includes threaded mounting hardware, ensure the threads match standard hardware you’ll use. Most kits use standard SAE or metric threads, but mixing them creates problems.
Finish: Hood pins come in various finishes including polished, brushed, anodized, and chrome. Choose a finish that matches your vehicle’s other hardware and your aesthetic preferences.
Quality Indicators
Not all hood pin kits are created equal. Quality indicators include:
- Consistent machining with no burrs or sharp edges
- Smooth pin insertion and release action
- Quality springs (if applicable) that provide positive return
- Hardware that includes lock washers and appropriate nuts
- Clear installation instructions
Avoid the cheapest kits you find online—they often have soft metal that strips easily, poor threading, and springs that fatigue quickly. A hood pin that fails to engage properly is worse than no hood pin at all.
Quantity: One or Two?
Most hood pin kits include two pins—one for each side of the hood. Some vehicles benefit from additional pins (four total, or even six for very long hoods), but two is the standard configuration.
For race cars and serious performance applications, many installers use four pins total—two as primary latches and two as secondary safety devices. This ensures the hood stays down even if one pin fails or is improperly seated.
Tools and Materials Needed
Gather everything before you start. You’ll need tools for both body work and potentially electrical work if your kit includes LED indicators.
Hand Tools
A complete wrench and socket set handles most mounting bolts. You’ll typically need metric or SAE wrenches in various sizes depending on your kit. A drill with bits is essential for creating mounting holes if your vehicle doesn’t have existing locations. A center punch marks hole locations precisely before drilling to prevent drill bit walking.
Sheet metal tools help if you need to modify existing sheet metal. Tin snips cut metal cleanly, and a deburring tool removes sharp edges from drilled holes. Rivet nuts require specific tools but provide secure threaded mounting points in sheet metal.
For measuring, have a tape measure and calipers available to verify dimensions and spacing.
Cutting and Drilling Equipment
If you’re drilling new mounting holes, quality matters:
- Drill bits in the appropriate sizes for your kit
- Step drill for creating larger holes cleanly
- Pilot drill bits to start holes accurately
- Center punch and hammer to mark hole centers
- Masking tape over the drilling area prevents paint chip-out
For vehicles with existing hood pin mounting provisions (many race-prepared vehicles have this), you may only need basic hand tools. For vehicles adding hood pins to stock sheet metal, budget extra time for the drilling work.
Electrical Tools (If Wiring LED Indicators)
Some hood pin kits include LED indicator lights that illuminate when the pin is properly seated. If you’re installing one of these:
- Wire strippers and crimpers
- Electrical tape and heat shrink tubing
- A test light or multimeter
- Soldering equipment (optional but recommended)
- Wiring diagram for your specific vehicle
Safety Equipment
Eye protection is essential when drilling or cutting metal. Hearing protection matters if using power tools for extended periods. Work gloves protect your hands from sharp metal edges. A fire extinguisher should be nearby when working in the engine bay—fuel lines and battery connections are fire risks.
Installation Step-by-Step
Let’s get into the actual installation process. We’ll cover planning, mounting, and finishing work.
Step 1: Plan Your Mounting Locations
Before drilling any holes or making any permanent modifications, plan exactly where the hood pins will go. This is the most critical step—mistakes here are difficult to correct.
Measure Twice, Drill Once: Use tape measure and marking tools to identify the ideal pin locations. Consider:
- The pin should engage when the hood is fully closed but not yet latched
- The engagement should feel positive—you should hear or feel a click when the pin seats
- The pin should be accessible for insertion and removal without awkward reaching
- Wiring (if applicable) should route cleanly without interfering with moving parts
- The mounting area should have adequate structural support—avoid thin sheet metal edges
Check Hood Clearance: Close the hood with manual pressure and check the gap at various points. Hood-to-fender clearance, hood-to-windshield clearance, and hood-to-core support clearance all affect pin placement. You want the pin to engage with the hood fully seated but not forcing alignment.
Account for Alignment Variations: Vehicle bodies aren’t perfectly consistent. The gap at the driver’s side front corner might differ from the passenger’s side. Measure each side separately and plan accordingly.
For many applications, hood pin mounting locations are guided by existing provisions on the vehicle. Race cars, Jeeps, and other vehicles that commonly use hood pins often have pre-drilled mounting holes or mounting tabs. Check your vehicle before assuming you need to drill new holes.
Step 2: Test Fit the Components
Before making permanent installations, do a test fit of everything:
- Position the receiver (female part) on the body where you plan to mount it
- Position the pin assembly on the hood at the corresponding location
- Close the hood partially and check alignment
- Adjust positions as needed until engagement feels positive
This test fitting reveals any issues with alignment, pin length, or clearance before you commit to drilling. Don’t skip this step—it’s much easier to adjust positions than to patch and redrill holes.
Step 3: Prepare the Mounting Surfaces
With positions finalized, prepare the surfaces for mounting:
Clean the Area: Remove any dirt, grease, or wax from the mounting locations. Use degreaser or rubbing alcohol to ensure clean surfaces for adhesive and proper metal-to-metal contact.
Protect Paint: If you’re drilling near painted surfaces, apply masking tape to protect the finish. Drilling creates vibration that can chip nearby paint, and metal fragments can scratch surfaces.
Mark Hole Centers Precisely: Use a center punch and hammer to create a definite point for your drill bit to follow. This prevents the bit from walking across the surface and ensures accurate holes.
Drill Pilot Holes: Start with a small pilot drill bit to establish the hole path. This is more accurate than jumping straight to the final hole size.
Enlarge to Final Size: Use step drills or progressively larger bits to reach the final diameter. Take your time—rushing risks bit binding and surface damage.
Deburr All Holes: After drilling, remove sharp edges and burrs from both sides of each hole. Use a deburring tool, file, or sandpaper. Sharp edges damage pin finishes and can cause injury during maintenance.
Step 4: Install the Receivers
The receiver (female component) typically mounts to the body—usually the firewall, fender, or core support, depending on your pin placement. Install receivers first:
Position the Receiver: Hold the receiver in position and verify alignment one final time. The opening should face the direction that allows pin insertion when the hood closes.
Mark Mounting Holes: Use a marker or scribe to mark the receiver’s mounting hole locations through the receiver’s mounting slots.
Drill Mounting Holes: Drill holes at your marked locations. Match the hole size to the hardware included with your kit or the mounting bolts you’re using.
Install with Hardware: Secure the receiver with the provided hardware. Use lock washers under nuts to prevent loosening from vibration. Don’t overtighten—stripped threads in aluminum components are frustrating to repair.
Apply Sealant: For weather-exposed installations, apply a small bead of silicone sealant around the receiver’s base to prevent water intrusion. This is particularly important for the engine bay side of the firewall—rain and engine wash can push water into the cabin through gaps.
Step 5: Mount the Pin Assembly
With receivers installed, mount the pin assembly to the hood:
Position the Pin Bracket: Locate the bracket or plate that holds the pin mechanism. This typically mounts to the underside of the hood using bolts or rivets.
Check Clearances: Before drilling, verify the bracket and pin have adequate clearance from hood interior components—wiring, weatherstripping, hood insulation, and other parts. The pin must extend through the hood surface without interfering with anything.
Drill Mounting Holes: Following the same process as before—mark, center punch, pilot drill, enlarge, and deburr.
Secure the Bracket: Mount the bracket using appropriate hardware. If using rivet nuts, ensure they’re properly installed before loading the bracket. Tighten all fasteners securely.
Attach the Pin: Install the pin mechanism into its bracket according to the kit’s instructions. Some pins thread in; others use retaining clips or set screws. Verify smooth operation before finalizing.
Step 6: Adjust Pin Engagement
With both components installed, check the engagement:
- Close the hood slowly and observe how the pin approaches the receiver
- The pin should slide into the receiver opening without forcing
- When fully engaged, you should feel or hear a positive click
- If the pin doesn’t engage easily, adjust the receiver position slightly
Adjustment Options: Most receivers have slotted mounting holes that allow some positional adjustment. Loosen the mounting hardware, reposition slightly, and retighten. Repeat until engagement feels positive.
Spring Tension (Quick-Release Pins): If your kit includes spring-loaded quick-release pins, verify the spring provides positive return. The pin should push out firmly when released, not hang loosely.
Safety Clip Installation: If your kit includes safety clips or tether cables, install these last. They prevent the pin from being lost if it backs out during driving.
Step 7: Wiring LED Indicators (If Equipped)
Many hood pin kits include LED indicators that illuminate when the hood is properly secured. Here’s how to wire them:
Plan the Wiring Route: Run wiring from each hood pin LED through the hood hinge area to the vehicle’s interior. Use existing wire channels if available. The wiring must flex every time you open and close the hood, so use appropriate flexible wire and include service loops.
Connect to Power: LED hood pins typically wire to a 12V source that turns on with the ignition or runs directly from the battery through a fused circuit. Connect the ground wire to a good chassis ground.
Install a Dummy Load or Indicator: Some LED hood pins require a resistor or control module to function properly. Follow the kit’s wiring diagram precisely.
Test Before Finishing: Before reassembling trim panels and closing everything up, test the LED function with the hood open, closed, and in various positions. Adjust wiring routing if needed.
Secure All Wiring: Use zip ties and adhesive clips to secure wiring away from moving parts and heat sources. Any wiring that contacts hot exhaust components will fail quickly.
Step 8: Final Verification
Before declaring the installation complete, perform thorough verification:
Physical Security: Grab the hood and try to lift it without pressing the release. It should not lift. The pins should hold the hood firmly in the closed position.
Positive Engagement: Close the hood using the factory latch, then test each pin. Insert each pin and verify it clicks or seats positively. Pull on each pin to confirm it’s secured.
No Rubbing or Contact: With the hood closed and latched, verify the hood pin components don’t rub against anything during normal engine vibration. Pay attention during engine revving and while driving over rough roads if possible.
Weather Seal: If applicable, verify weathertightness. Spray water across the hood edges and check for leaks at the pin locations.
Paint Protection: Inspect paint around the new holes for any chips or scratches. Touch up as needed to prevent rust.
Common Installation Issues and Solutions
Even careful installations encounter problems. Here are common issues and their solutions.
Hood Won’t Close with Pins Engaged
This usually indicates the pins are positioned too low or the receivers are misaligned. The hood must pass over the pin engagement depth before the pin can insert.
Solution: Adjust receiver positions slightly, or check if pin length is excessive for your application. You might need shorter pins or receivers with deeper engagement.
Pins Feel Loose When Engaged
Loose pin engagement feels sloppy and provides less security.
Solution: Check that springs (if present) are properly installed and providing adequate tension. Verify the receiver isn’t worn or damaged. The pin diameter should match the receiver opening closely—excessive clearance creates slop.
Holes Don’t Align
If your mounting holes don’t align with the components, you have measurement errors.
Solution: For minor misalignment, elongated slots in mounting plates can provide adjustment. For major errors, you may need to plug old holes and redrill. Epoxy-based metal filler can fill small holes if redrilling isn’t practical.
Wiring Doesn’t Work (LED Kits)
If the LED indicators don’t illuminate, wiring is suspect.
Solution: Check all connections with a multimeter. Verify ground connections are solid. Test the LED pins directly with 12V power to confirm the LEDs themselves work. Check any required resistors or control modules.
Vibration Loosening
If hardware loosens over time, the installation needs improvement.
Solution: Use lock washers on all hardware. Apply medium-strength thread locker to fasteners. Check that mounting surfaces are solid—not flexing under load.
Hood Pin Kit Maintenance
Your newly installed hood pins need periodic attention to stay secure:
Regular Inspection: Check pin engagement and hardware tightness at every oil change or major service. Vibration loosens fasteners over time.
Lubrication: Light oil on the pin surfaces prevents binding and corrosion. Don’t overlubricate—excess oil attracts dirt.
Electrical Check: If your kit has LED indicators, verify function regularly. Failed LEDs might indicate wiring problems that could leave you unaware if a pin backs out.
Cleanliness: Keep pin mechanisms free of accumulated dirt, especially after off-road driving or track sessions. Debris in the engagement mechanism causes poor seating.
Replace Worn Components: Springs lose tension, receivers wear, and pins develop slop. Replace worn components before they fail completely.
When Professional Installation Makes Sense
While hood pin kit installation is within most DIY capabilities, some situations warrant professional help:
Custom Fabrication: If your vehicle requires custom brackets or mounting plates, a fabricator produces cleaner results than improvised solutions.
Wiring Complexity: If you’re not comfortable with automotive electrical work, have the LED wiring done professionally.
Paint Protection: If you’re concerned about paint damage during drilling, a body shop can handle the drilling work cleanly.
Structural Concerns: If the mounting locations you need require cutting into structural components, consult a professional to assess implications.
Summary: Key Points to Remember
A properly installed hood pin kit provides reliable hood security with the distinctive performance aesthetic that enthusiasts appreciate. Take your time with the installation, and you’ll have a result that works reliably for years.